Creating Simple Spring Boot Web Application Using Maven
In this tutorial, we will show you how to create a very simple spring boot web application using maven.
Spring Boot lets you create an application with minimal configurations but with the functionality of and advantages of spring framework. When creating a simple spring boot web application, spring boot eliminates the need of creating a web.xml, a dispatcher, or other XML configurations. Spring Boot automatically creates those configurations for you just by adding the right dependency in your Maven or Gradle project.
Creating Simple Spring Boot Web Application Using Maven
This uses Spring MVC, Thymeleaf, and of course the spring framework. This can be your base project when creating a web application in the future.
Create a New Project with Maven
First, we create a new project in IDE. We are using IntelliJ but should be the same in other IDEs.
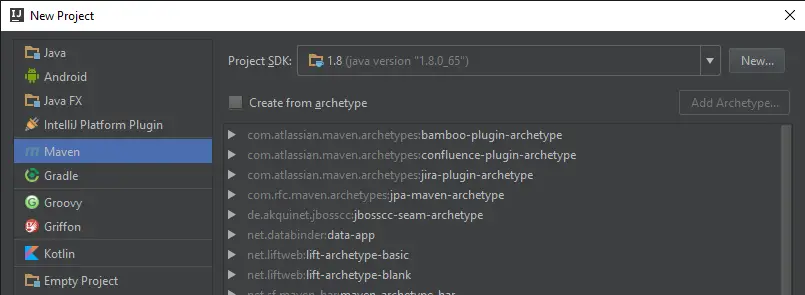
You don’t need to create a maven project using any archetype. We’ll just create the basic maven project.
Add Pom Dependencies
Next we configure the pom.xml. First, add the packaging tag to tell maven how to package your application. First, let’s make this to a jar. We’ll also show you how to package this into a war file to be deployed in application servers.
<packaging>jar</packaging>
To be able for your project to work with spring boot, your project should be a child of the parent spring boot module. So we need to add the parent tag in our pom.xml and point to spring-boot-starter-parent.
<parent>
    <groupId>org.springframework.boot</groupId>
    <artifactId>spring-boot-starter-parent</artifactId>
    <version>1.3.6.RELEASE</version>
    <relativePath/>
</parent>
Then we need the spring boot starter dependencies.
    <dependencies>
        <dependency>
            <groupId>org.springframework.boot</groupId>
            <artifactId>spring-boot-starter</artifactId>
        </dependency>
        <dependency>
            <groupId>org.springframework.boot</groupId>
            <artifactId>spring-boot-starter-web</artifactId>
        </dependency>
        <dependency>
            <groupId>org.springframework.boot</groupId>
            <artifactId>spring-boot-starter-thymeleaf</artifactId>
        </dependency>
        <dependency>
            <groupId>org.springframework.boot</groupId>
            <artifactId>spring-boot-devtools</artifactId>
        </dependency>
    </dependencies>
- spring-boot-starter – this lets spring boot autoconfigure your application
- spring-boot-starter-web – this dependency tells spring boot that your application is a web application. This adds the functionality of @Controller, @RequestMapping, etc.
- spring-boot-starter-thymeleaf – web app needs some views like JSP or HTML. Thymeleaf is a server-side HTML template engine. Instead of traditional JSP with JSTL or format tags, we will use Thymeleaf.
- spring-boot-devtools – this is an optional dependency but this makes your development faster. This dependency automatically restarts or hot-swap your changes to the running tomcat server, thus removing the need to restart the application whenever there are changes in codes.
Create the Main Class
Just like any java application, we need to define the main method in which will be the starting point. Here we create a class named Application.java with the annotation @SpringBootApplication.
@SpringBootApplication
public class Application {
    public static void main(String[] args) {
        SpringApplication.run(Application.class, args);
    }
}
This will also be the class that you should run in order to start your web application.
Spring MVC Controllers
To be able to handle web requests, our application should have controllers. Here is a sample controller HomeController that handles the request to the path “/”.
@Controller
public class HomeController {
    @RequestMapping("/")
    public String viewHome() {
        return "index";
    }
}
The method viewHome() tell us that any request for path “/” will go inside this method and will return the view “index” which will be created in the next step.
Creating the Views
Thymeleaf needs 2 folders: static and templates folder inside the resources folder. The static folder contains your static files like CSS, JS, and images. The templates folder contains the actual HTML fragment files that will be used to create the actual HTML that will be rendered on browsers.
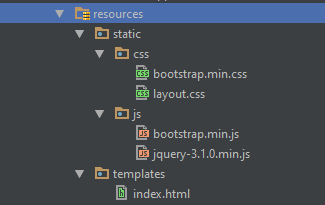
Our index.html contains a basic form login.
Creating application.properties
At this time, you can already run your project without creating an application.properties file. Spring will just use the default configurations for your web application. If you want to be more specific, you can create an application.properties inside the resources folder and define the configuration that you want to use such as the context path, port of tomcat to use, and more (see Spring Boot Common Application Properties).
Here is our sample application.properties:
#if you're using Spring Boot 1.x, use:
server.contextPath=/javapointers

#if you're using Spring Boot 2.x, use:
server.servlet.contextPath=/javapointers

server.port=8085
These tell us that the application will have a context path of “/javapointers”. Note that the key for context path was changed from server.contextPath to server.servlet.contextPath in Spring Boot 2. Tomcat will run on port 8085 so the final URL will be localhost:8085/javapointers.
Running the Web Application
Finally, we can now run our simple spring boot web application. To run, open the class Application then right-click the main method and select run or debug to debug the app. This will display the spring boot banner and logs in the console.
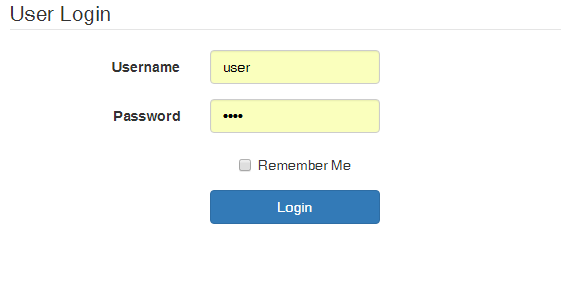
In your favorite browser, type “localhost:” + the port you have chosen + the context path. In our case, “localhost:8085/javapointers”. Then it should show the HTML that you have created:
You can download the source code for simple spring boot web application using this link
The next tutorial is about how you can Add Spring Security to Spring Boot Web Application.