How to Upload File in Spring MVC
Spring MVC has a built-in MultipartFile class that is necessary to upload file in spring mvc. In order to upload file in spring mvc, we need to configure our dispatcher-servlet.xml to add the maximum file upload size, creating a controller and a logic to save the file that was uploaded. This assumes that you have already a working spring mvc project or click here on How to Create Spring MVC Project using Maven.
1. Modify you dispatcher-servlet.xml to Upload File in Spring MVC
Create a new bean that defines that maximum upload size of the file.
<property name="maxUploadSize" value="268435456" />
Your dispatcher-servlet.xml should be look somthing similar to this:
    <mvc:annotation-driven />
    <context:component-scan base-package="com.javapointers"/>


        <property name="prefix" value="/WEB-INF/jsp/" />
        <property name="suffix" value=".jsp" />


        <property name="maxUploadSize" value="268435456" />


    <mvc:view-controller path="/" view-name="upload" />
2. Create your Upload Controller
Create a Controller class that will handle file upload in spring mvc.
package com.javapointers.controller;

import com.javapointers.service.FileService;
import org.springframework.beans.factory.annotation.Autowired;
import org.springframework.stereotype.Controller;
import org.springframework.web.bind.annotation.RequestMapping;
import org.springframework.web.bind.annotation.RequestMethod;
import org.springframework.web.bind.annotation.RequestParam;
import org.springframework.web.multipart.MultipartFile;
import org.springframework.web.servlet.ModelAndView;

import java.util.HashMap;
import java.util.Map;

@Controller
public class UploadController {

    @Autowired
    private FileService fileService;

    @RequestMapping(value = "/upload", method = RequestMethod.POST)
    public ModelAndView uploadFile(@RequestParam("file") MultipartFile multipartFile){
        long fileSize = multipartFile.getSize();
        String fileName = multipartFile.getOriginalFilename();
        ModelAndView modelAndView = new ModelAndView("upload-success");
        if(fileService.saveFile(multipartFile)){
            Map<String, Object> modelMap = new HashMap<>();
            modelMap.put("fileName", fileName);
            modelMap.put("fileSize", fileSize);
            modelAndView.addAllObjects(modelMap);
            return modelAndView;
        }
        return new ModelAndView("upload-failed");
    }

}
3. Create a File Service
Create a class that will save the file in the file system. In this example, the files are being saved in
C:\Javapointers.
package com.javapointers.service;

import org.springframework.stereotype.Service;
import org.springframework.web.multipart.MultipartFile;

import java.io.File;
import java.io.IOException;

@Service("fileService")
public class FileService {

    public static final String SAVE_LOCATION = "C:/Javapointers/";

    public boolean saveFile(MultipartFile multipartFile){
        boolean result = false;
        //set the saved location and create a directory location
        String fileName  = multipartFile.getOriginalFilename();
        String location = SAVE_LOCATION;
        File pathFile = new File(location);
        //check if directory exist, if not, create directory
        if(!pathFile.exists()){
            pathFile.mkdir();
        }

        //create the actual file
        pathFile = new File(location + fileName);
        //save the actual file
        try {
            multipartFile.transferTo(pathFile);
            result = true;
        } catch (IOException e) {
            e.printStackTrace();
        }
        return result;
    }
}
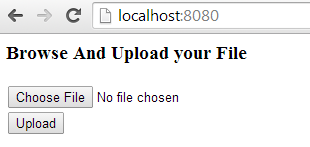
4. Create your jsp file
Create an input element with the name file (as we have defined in @RequestParam(“file”)).
Here is our upload.jsp
<%@ page contentType="text/html;charset=UTF-8" language="java" %>
<html>
<head>
    <title>Upload Javapointers</title>
</head>
<body>
Browse And Upload your File
</body>
</html>
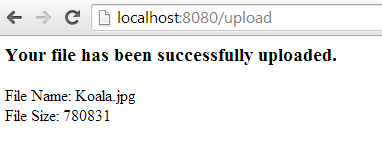
5. Testing our File Upload in Spring MVC application
We now test our application. If the file successfully uploaded to the server, the request will be redirected to the successful page displaying the name of the file and its size.