How to create Spring MVC Project using Maven
In this tutorial, we will be creating a simple Spring MVC Project using maven. Spring MVC is a popular framework when creating web applications. We will be using Spring MVC4 and Maven 3 in this post.
1.Create New Web Project in Maven
First, create a new spring mvc web application project using maven. Click the link below on how to create web project in maven using IntelliJ or NetBeans:
How to create Web Application using Maven in IntelliJ
How to create Web Application using Maven in NetBeans
2. Configure pom.xml
In your pom.xml, add spring mvc dependencies.
<dependency>
    <groupId>org.springframework</groupId>
    <artifactId>spring-core</artifactId>
    <version>${spring.version}</version>
</dependency>

<dependency>
    <groupId>org.springframework</groupId>
    <artifactId>spring-web</artifactId>
    <version>${spring.version}</version>
</dependency>

<dependency>
    <groupId>org.springframework</groupId>
    <artifactId>spring-webmvc</artifactId>
    <version>${spring.version}</version>
</dependency>
and add spring.version to your properties section
<properties>
    <spring.version>4.0.2.RELEASE</spring.version>
</properties>
Your final pom.xml should be look similar to this:
<project xmlns="http://maven.apache.org/POM/4.0.0" xmlns:xsi="http://www.w3.org/2001/XMLSchema-instance"
         xsi:schemaLocation="http://maven.apache.org/POM/4.0.0 http://maven.apache.org/maven-v4_0_0.xsd">
    <modelVersion>4.0.0</modelVersion>
    <groupId>SpringMVC4</groupId>
    <artifactId>SpringMVC4</artifactId>
    <packaging>war</packaging>
    <version>1.0-SNAPSHOT</version>
    <name>SpringMVC4 Maven Webapp</name>
    <url>http://maven.apache.org</url>

    <properties>
        <jdk.version>1.8</jdk.version>
        <spring.version>4.0.2.RELEASE</spring.version>
    </properties>
    <dependencies>
        <dependency>
            <groupId>junit</groupId>
            <artifactId>junit</artifactId>
            <version>3.8.1</version>
            <scope>test</scope>
        </dependency>


        <dependency>
            <groupId>org.springframework</groupId>
            <artifactId>spring-core</artifactId>
            <version>${spring.version}</version>
        </dependency>

        <dependency>
            <groupId>org.springframework</groupId>
            <artifactId>spring-web</artifactId>
            <version>${spring.version}</version>
        </dependency>

        <dependency>
            <groupId>org.springframework</groupId>
            <artifactId>spring-webmvc</artifactId>
            <version>${spring.version}</version>
        </dependency>

    </dependencies>
    <build>
        <finalName>SpringMVC4</finalName>
        <plugins>
            <plugin>
                <groupId>org.apache.maven.plugins</groupId>
                <artifactId>maven-compiler-plugin</artifactId>
                <version>3.0</version>
                <configuration>
                    <source>${jdk.version}</source>
                    <target>${jdk.version}</target>
                </configuration>
            </plugin>
            <plugin>
                <groupId>org.mortbay.jetty</groupId>
                <artifactId>maven-jetty-plugin</artifactId>
                <version>6.1.10</version>
                <configuration>
                    <scanIntervalSeconds>10</scanIntervalSeconds>
                    <connectors>
                        <connector implementation="org.mortbay.jetty.nio.SelectChannelConnector">
                            <port>8080</port>
                            <maxIdleTime>60000</maxIdleTime>
                        </connector>
                    </connectors>
                    <stopKey>STOP</stopKey>
                    <stopPort>8005</stopPort>
                </configuration>
            </plugin>
        </plugins>
    </build>
</project>
3.Configure dispatcher-servlet.xml and web.xml
Under WEB-INF folder, create a file named dispatcher-servlet.xml. Open the file and copy the following code.
<?xml version="1.0" encoding="UTF-8"?>
<beans xmlns="http://www.springframework.org/schema/beans"
       xmlns:xsi="http://www.w3.org/2001/XMLSchema-instance"
       xmlns:context="http://www.springframework.org/schema/context"
       xmlns:mvc="http://www.springframework.org/schema/mvc"
       xsi:schemaLocation="http://www.springframework.org/schema/beans http://www.springframework.org/schema/beans/spring-beans.xsd http://www.springframework.org/schema/context http://www.springframework.org/schema/context/spring-context.xsd http://www.springframework.org/schema/mvc http://www.springframework.org/schema/mvc/spring-mvc.xsd">

    <mvc:annotation-driven />
    <context:component-scan base-package="com.javapointers.controllers" />

    <bean class="org.springframework.web.servlet.view.InternalResourceViewResolver">
        <property name="prefix" value="/WEB-INF/jsp/" />
        <property name="suffix" value=".jsp" />
    </bean>

</beans>
<mvc:annotation-driven/> declares support annotation driven mvc such using @Controller, @Service, @Component.
<context:component-scan base-package=”com.javapointers.controllers” /> means to scan classes from this base package to determine all bean classes.
The view resolver specifies the locations of our views(jsp) and the extension.
In your web.xml, add the spring configurations inside web-app section.
<context-param>
    <param-name>contextConfigLocation</param-name>
    <param-value>/WEB-INF/dispatcher-servlet.xml</param-value>
</context-param>
<listener>
    <listener-class>org.springframework.web.context.ContextLoaderListener</listener-class>
</listener>
<servlet>
    <servlet-name>dispatcher</servlet-name>
    <servlet-class>org.springframework.web.servlet.DispatcherServlet</servlet-class>
    <load-on-startup>1</load-on-startup>
</servlet>
<servlet-mapping>
    <servlet-name>dispatcher</servlet-name>
    <url-pattern>/</url-pattern>
</servlet-mapping>
4. Creating a Controller
Create a simple controller class that is inside your base package defined in dispatcher-servlet.xml.
HomeController.java
package com.javapointers.controllers;

import org.springframework.stereotype.Controller;
import org.springframework.web.bind.annotation.RequestMapping;
import org.springframework.web.bind.annotation.RequestMethod;

@Controller
public class HomeController {

    @RequestMapping(value="/home", method = RequestMethod.GET)
    public String viewHome(){
        return "home";
    }
}
In this class, we have defined HomeController as a Controller class by @Controller annotation. We have also create a simple method that has a url mapping of “/home” with method GET. This means that when the user types the url /home in the browser, the request will be redirected to this method. This method return the string “home”. Using the ViewResolver defined in dispatcher-servlet.xml, the final location of the jsp will then be /WEB-INF/jsp/home.jsp.
Under your WEB-INF folder, create a new folder named jsp. For security, our jsp files will be stored inside this folder.
home.jsp
<%@ page contentType="text/html;charset=UTF-8" language="java" %>
<html>
<head>
    <title></title>
</head>
<body>
    Welcome SpingMVC4 Home Page!
</body>
</html>
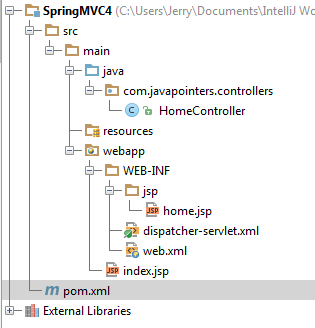
The final structure of your project should be look like this:
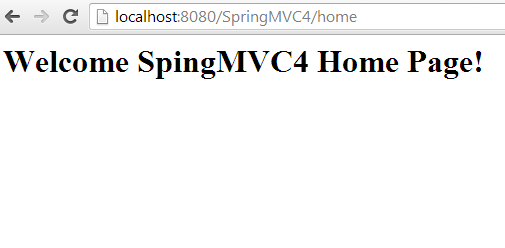
5.Testing your Web Application
If you are using NetBeans, you can run your spring mvc application by right clicking the project and Run. If you are using IntelliJ, in Maven Projects tab, navigate to Plugins, go to jetty and double click jetty run. If you are just using command line to run maven, type mvn jetty:run. The output should be look like this: