Java Rest using JAX-RS and Jetty Maven Plugin Tutorial
This tutorial will help how to get started with RESTful web service in Java Rest using JAX-RS and Jetty Maven Plugin. We will use a Jetty Plugin to easily test our application without the need of downloading of an application server. JAX-RS is an API that can serve different request to an application. It can handle different HTTP Request Method such as GET, POST, PUT and DELETE. By using a RESTful Web Service, we can then implement a Micro Service architecture in our application.
Creating a Simple Application using JAX-RS and Jetty Maven Plugin
First, create a Maven Project. The screenshots below uses IntelliJ but you can also use other IDE.
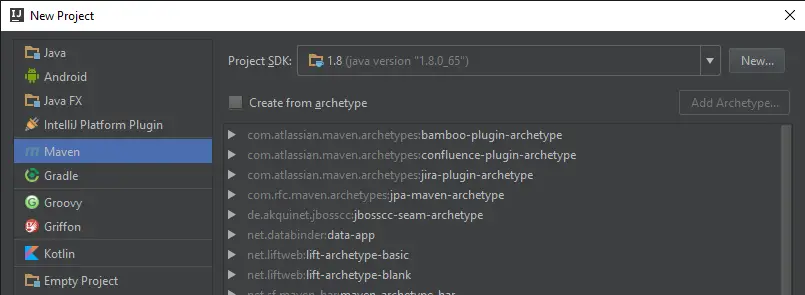
Add your GroupId and ArtifactId and complete the project creation.
Next, we will edit our pom.xml. Add the below dependency of Jersey. This dependency contains the implementation of JAX-RS. Other application server in J2EE such as GlassFish and WebSphere already have their own implementation. But for Jetty or Tomcat, they don’t have this since they are only a Servlet Container.
        <dependency>
            <groupId>org.glassfish.jersey.bundles</groupId>
            <artifactId>jaxrs-ri</artifactId>
            <version>2.29</version>
        </dependency>
Then add the Jetty Maven Plugin. Under your build element, create a plugins element and add the below xml:
            <plugin>
                <groupId>org.eclipse.jetty</groupId>
                <artifactId>jetty-maven-plugin</artifactId>
                <version>9.4.19.v20190610</version>
            </plugin>
Since we do not create a web.xml, we will add a property to our pom to prevent build failure if web.xml is not found. Add this to your pom.xml.
    <properties>
        <failOnMissingWebXml>false</failOnMissingWebXml>
    </properties>
And change the packaging to war:
<packaging>war</packaging>
Your final pom.xml should look something like this:
<?xml version="1.0" encoding="UTF-8"?>
<project xmlns="http://maven.apache.org/POM/4.0.0"
         xmlns:xsi="http://www.w3.org/2001/XMLSchema-instance"
         xsi:schemaLocation="http://maven.apache.org/POM/4.0.0 http://maven.apache.org/xsd/maven-4.0.0.xsd">
    <modelVersion>4.0.0</modelVersion>

    <groupId>com.javapointers</groupId>
    <artifactId>jaxrs-jetty-example</artifactId>
    <version>1.0-SNAPSHOT</version>
    <packaging>war</packaging>

    <properties>
        <failOnMissingWebXml>false</failOnMissingWebXml>
    </properties>

    <dependencies>
        <dependency>
            <groupId>org.glassfish.jersey.bundles</groupId>
            <artifactId>jaxrs-ri</artifactId>
            <version>2.29</version>
        </dependency>
    </dependencies>

    <build>
        <plugins>
            <plugin>
                <groupId>org.eclipse.jetty</groupId>
                <artifactId>jetty-maven-plugin</artifactId>
                <version>9.4.19.v20190610</version>
            </plugin>
        </plugins>
    </build>
</project>
After editing our pom, we will now start creating our JAX-RS resources. Start by creating a Java class that extends javax.ws.rs.core.Application. Annotate the class with @ApplicationPath with your own path. This path will be the base resource url in your rest service.
package com.javapointers.jaxrs;

import javax.ws.rs.ApplicationPath;
import javax.ws.rs.core.Application;

@ApplicationPath("/api")
public class RestApplication extends Application {
}
As you notice, we don’t define any body of our class. By annotating and extending our class, we let JAX-RS to scan our class path for any resource annotation. This helps us to minimize coding by not creating web.xml and servlet configurations.
Next, we will create our individual resource class. For our example, we will create a StudentResource that handles student information. The @Path annotation determines the URL Path for this API. The @GET, @POST, @PUT, @DELETE are the HTTP Methods. For simplicity, we are just returning Strings in Response. In reality, you might add some services and business logic that process the information received in the request.
package com.javapointers.jaxrs.resource;
import javax.ws.rs.*;
import javax.ws.rs.core.Response;
@Path("/student")
public class StudentResource {
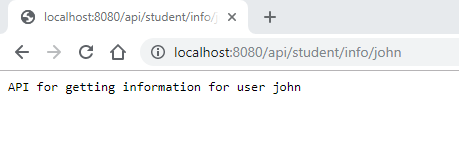
@GET
@Path("/info/{user}")
@Produces("application/json")
public Response getStudentInformation(@PathParam("user") String user) {
//this method get the information of the student
return Response.ok("API for getting information for user " + user).build();
}
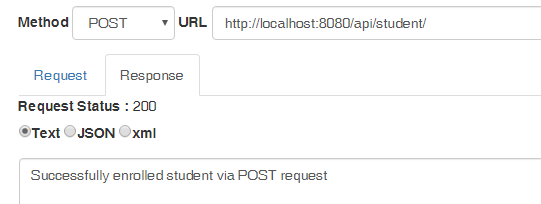
@POST
@Consumes("application/json")
@Produces("application/json")
public Response enrollStudent() {
//for simplicity, we just return a string
return Response.ok("Successfully enrolled student via POST request").build();
}
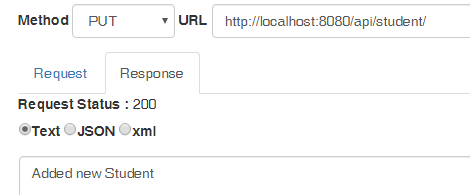
@PUT
@Produces("application/json")
public Response addNewStudent() {
return Response.ok("Added new Student").build();
}
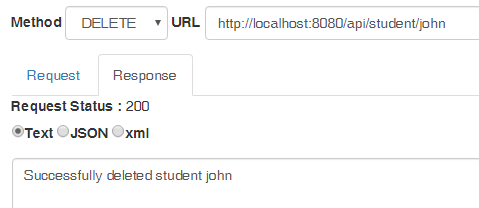
@DELETE
@Path("/{user}")
@Produces("text/plain")
public Response deleteStudent(@PathParam("user") String user) {
return Response.ok("Successfully deleted student " + user).build();
}
}
You can learn more about these annotations by visiting this Oracle site
https://docs.oracle.com/javaee/6/tutorial/doc/gilik.html#ginna
Finally, we run the application by clicking the Maven tab on the right side and expanding the Plugins and Jetty and double clicking the Jetty Run.
Testing our RESTful web service
To test GET, we simply put the URL in the browser
For POST, PUT and DELETE, we will use RESTful API Client plugin in Chrome.
Now that you have learned REST using JAX-RS, we’ll now proceed on learning how to implement it in Spring Boot. Next post is about Spring Boot REST JSON Tutorial.