How to Install CentOS 8 on VirtualBox
This tutorial will guide you on how to install CentOS 8 in a VirtualBox. We’ll start by installing an Oracle VM VirtualBox in a Windows 10 host machine, then creating a new CentOS 8 in the VirtualBox and finally installing VirtualBox Guest Additions on CentOS 8.
Install CentOS 8 on VirtualBox
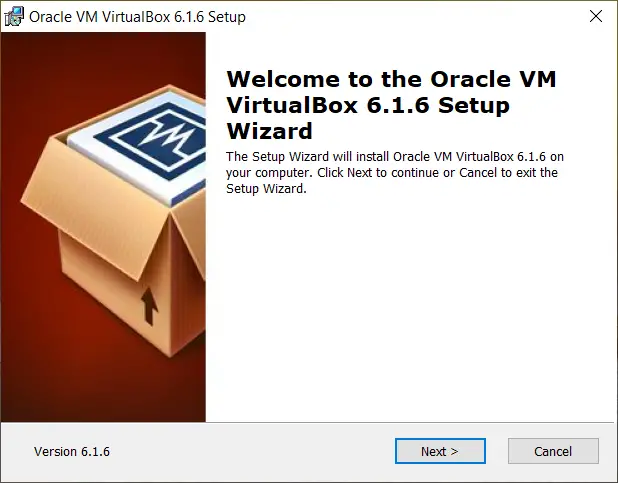
This guide uses VirtualBox 6.1. First, download the latest version of VirtualBox using this link https://www.virtualbox.org/wiki/Downloads. Then follow on-screen instructions to install it in a Windows machine. You also need to download the ISO image of CentOS 8. You can download the ISO image here https://www.centos.org/download/.
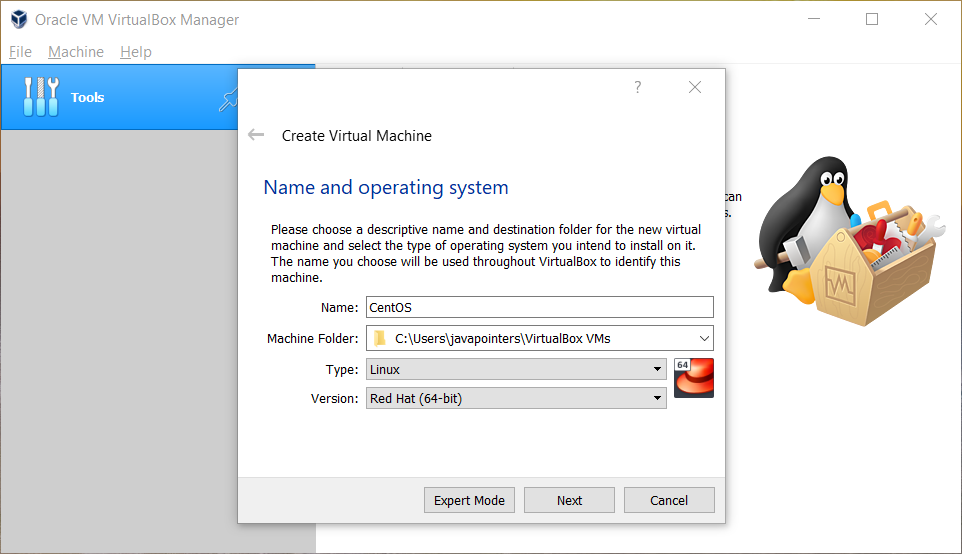
Once installed, click New to create CentOS 8 Virtual Machine. Type the name of the VM and select the correct type and version if it’s not been auto-selected.
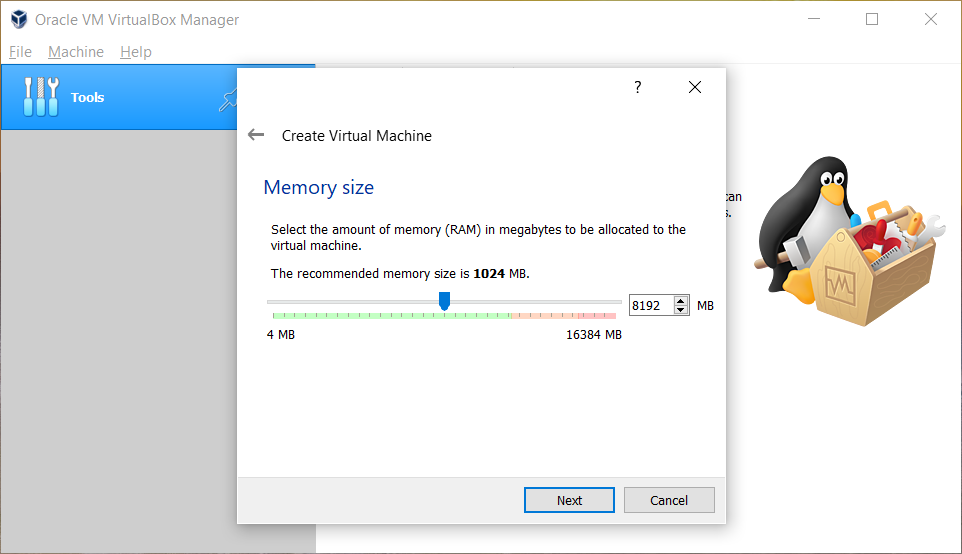
Click Next to continue. Adjust the memory size. Normally, we set it only within the green area to avoid using too much RAM on the host machine.
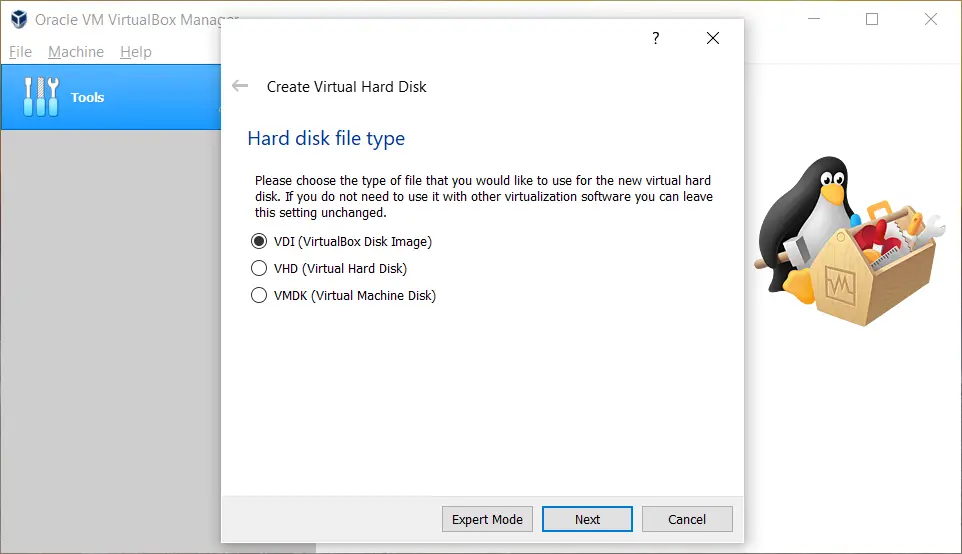
Next, we’ll create a virtual hard disk. This will be the HDD that your VM will use. We set it as a VirtualBox Disk Image with 20GB of space that is dynamically allocated so that it will not immediately take 20GB on the host machine but only consume space as the VM disk increases.
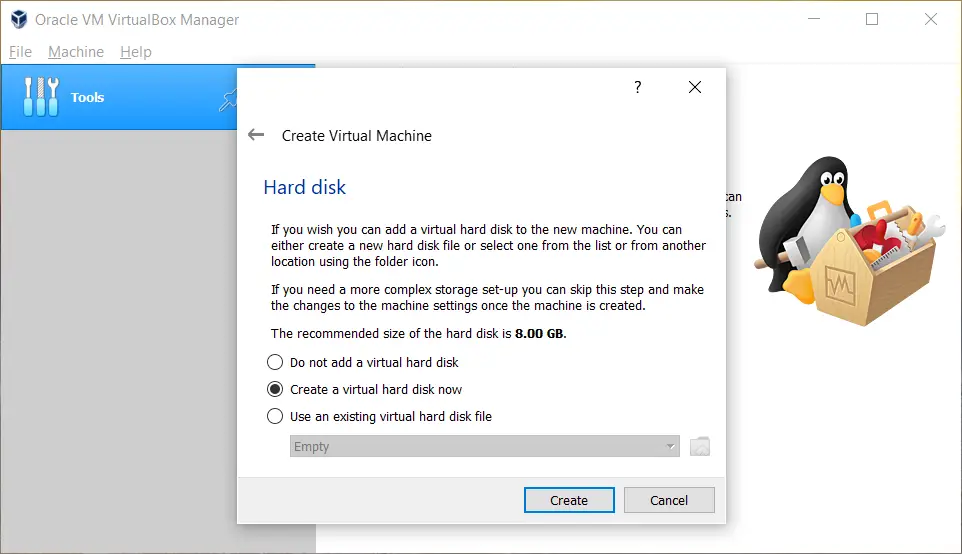

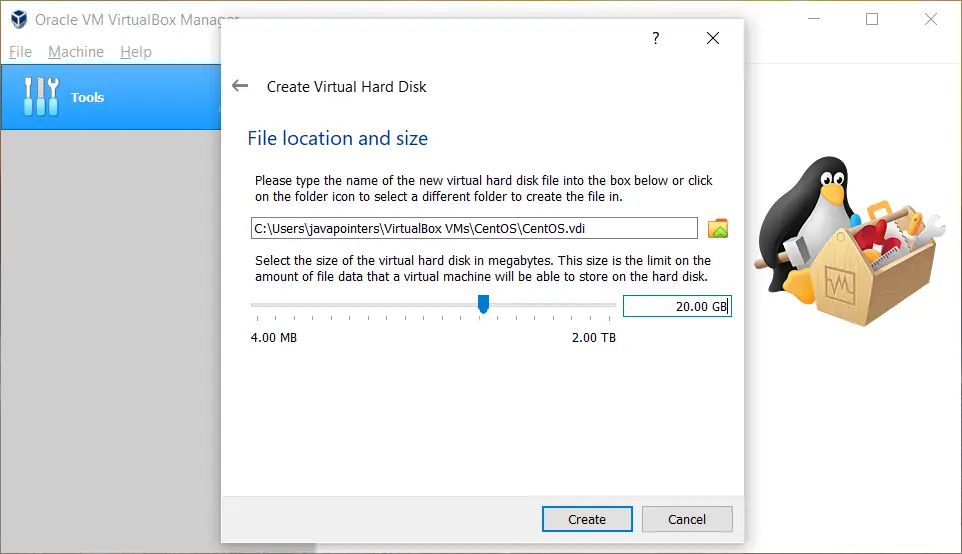
Click Create and you should see your newly created VM on the left side of VirtualBox.
Setup CentOS 8 on VirtualBox
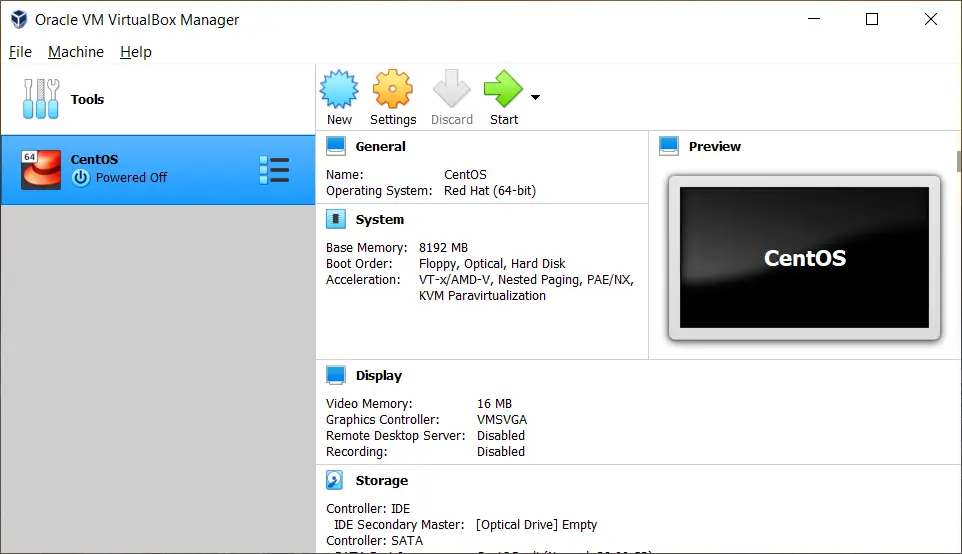
Before we proceed with the actual installation of CentOS operating system on the virtual machine, we first change some settings of our VM. With your VM selected on the left side, click Settings in the header panel. In the General section, go to the Advanced tab. Change the Shared Clipboard and Drag’n’Drop to Bidirectional to allow copy-paste functionality between the host machine and virtual machine. Take note that this might not work properly until we install the Virtual Box Guest Additions on CentOS later.

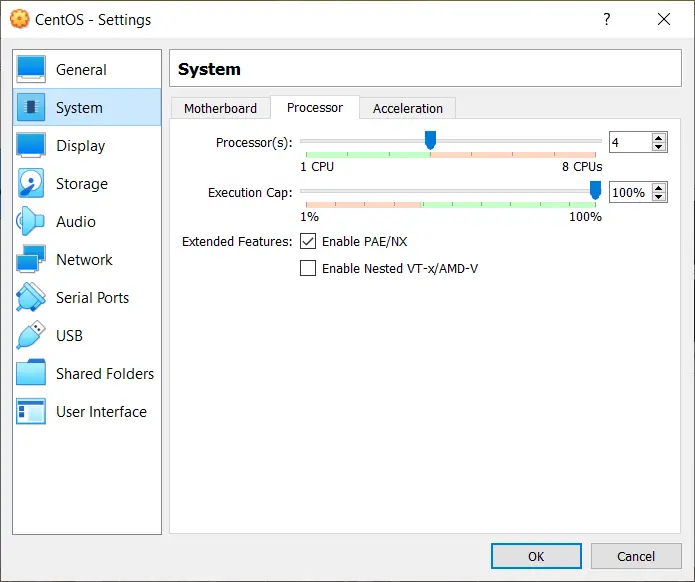
Next, go to the System section and in the Processor tab, increase the CPU size.
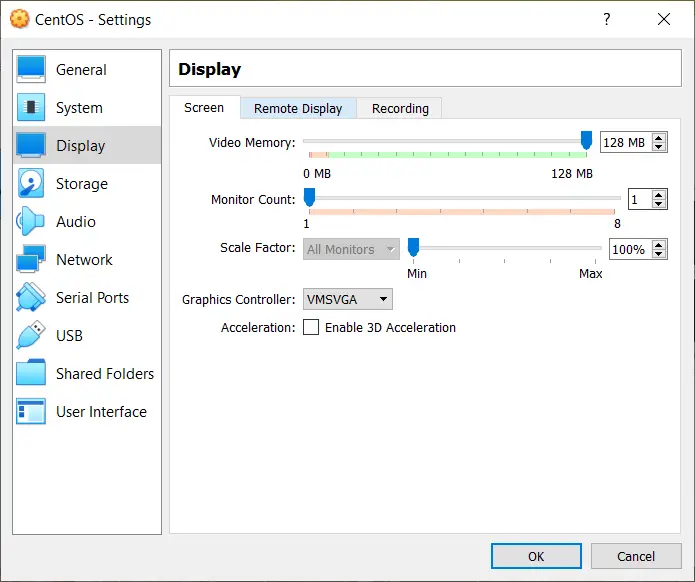
Then go to the Display section and increase the video memory.
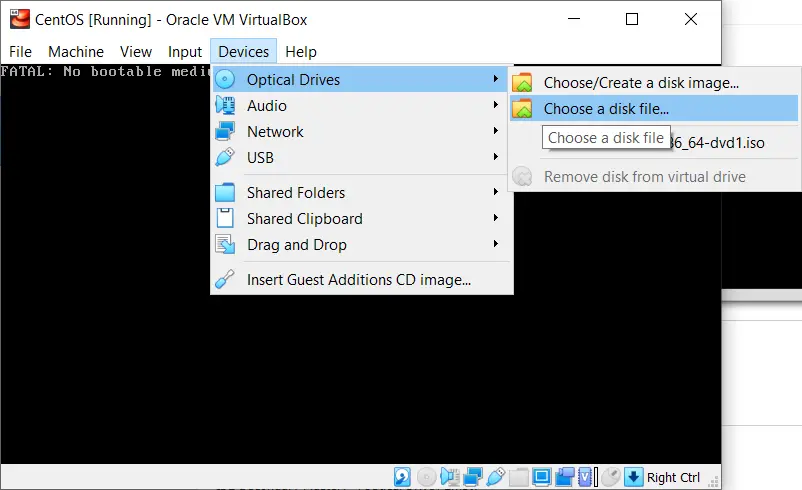
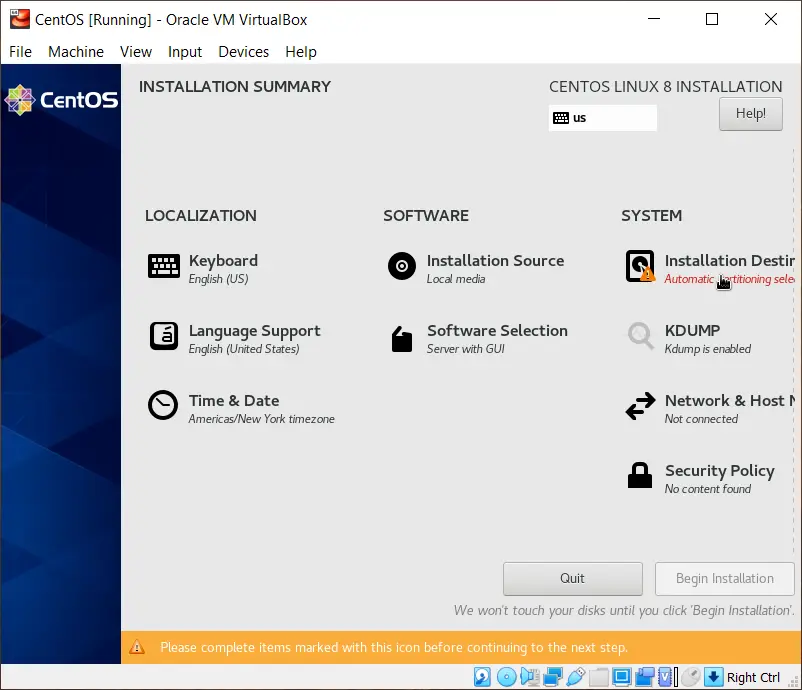
Click OK. We are now ready to install the operating system on our virtual machine. Click Start. Once the VM window is opened, go to Devices > Optical Drives > Choose a disk file… and select/browse the ISO image of CentOS 8 that we have downloaded earlier.
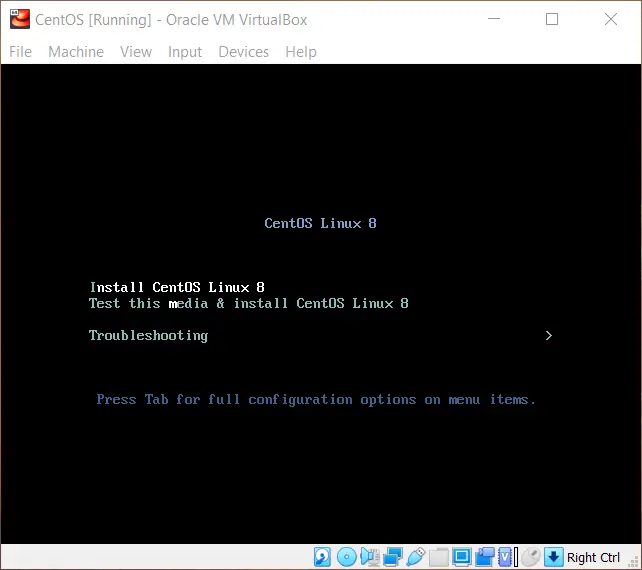
Then restart the machine by going to Machine > Reset. Once the machine has been reset, you should see the Centos 8 Installation screen. Select Install CentOS Linux 8. Note: You can go back to your host machine by hitting the control key which is by default is the right CTRL in your keyboard.
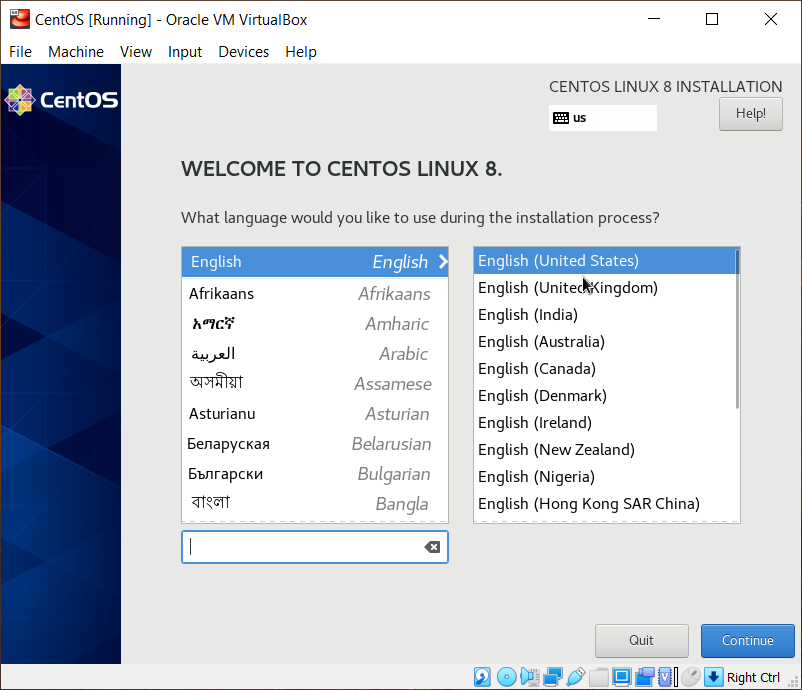
The installation wizard should continue. Select the language you would like to use during the installation process.
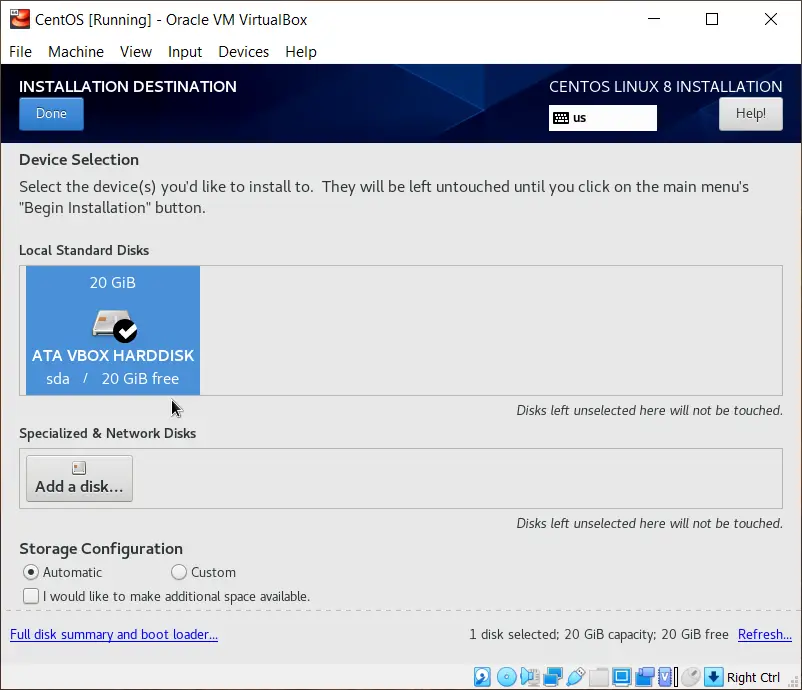
Click Continue. Next, you will select which drive you want to install the operating system. Previously, we created a 20gb virtual disk drive for this machine. We will then select that drive in this installation.
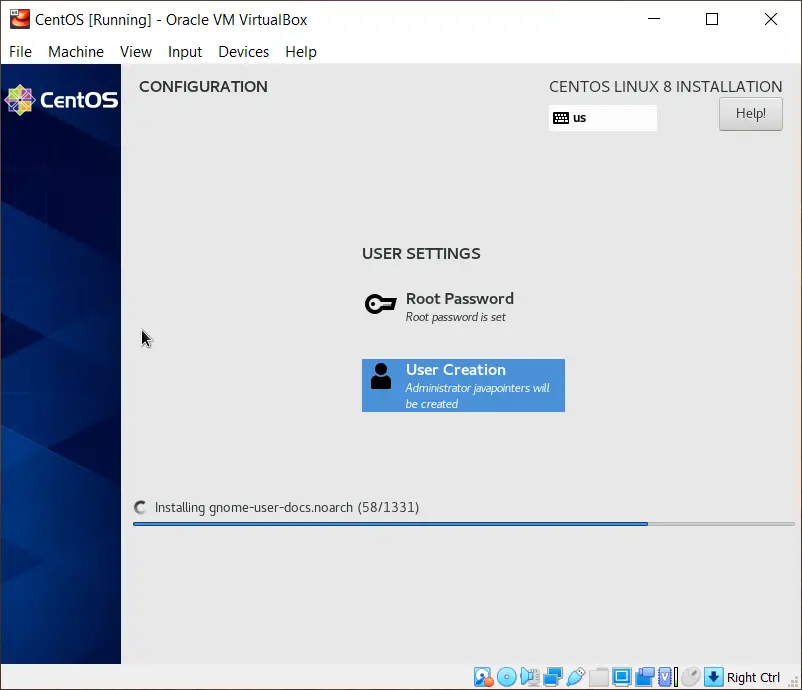
Click Done at the upper left side to continue. Then proceed with the installation process. You can also create your own user and set the root password while the wizard continues on installing the system.
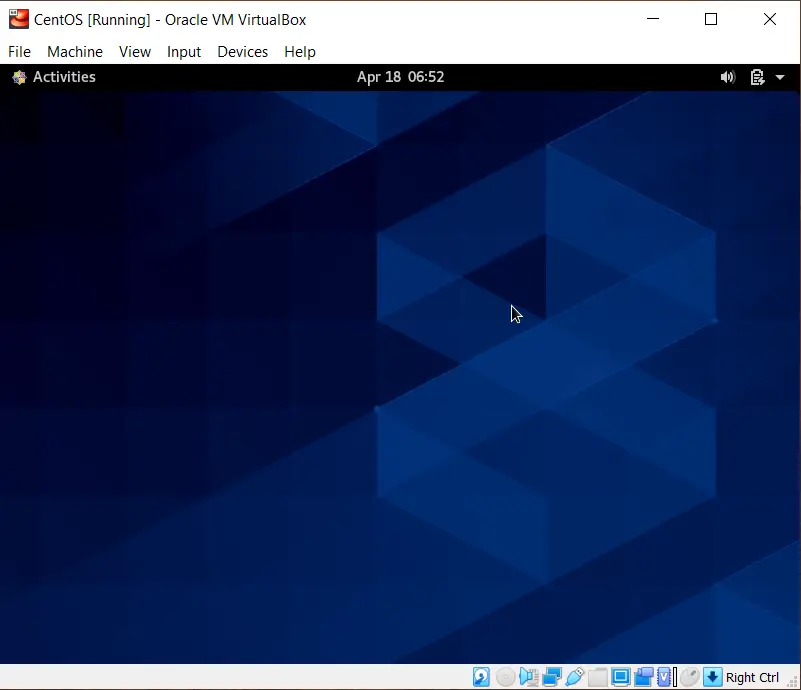
After a successful installation, you need to restart your virtual machine. This time, we don’t need the ISO image inserted in the optical drive. Thus, we can now remove the ISO image from it. Go to Devices > Optical Drives > Remove disk from virtual drive. If it prompts that it’s currently busy, then go ahead and force unmount it. Restart the VM by going to Machine > Reset. It should properly load and you should be greeted with a welcome screen from CentOS. It will prompt you for some configuration like language, etc. After that, it should display your Desktop.
Installing VirtualBox Guest Additions on CentOS
Now that we have a running CentOS 8 on a VirtualBox, we now installed the VirtualBox Guest Additions on Centos 8 to properly integrate the virtual machine to the host machine including copy/paste functionality, synchronizing the date/time from the host machine to virtual machine, mouse and keyboard integration and so on.
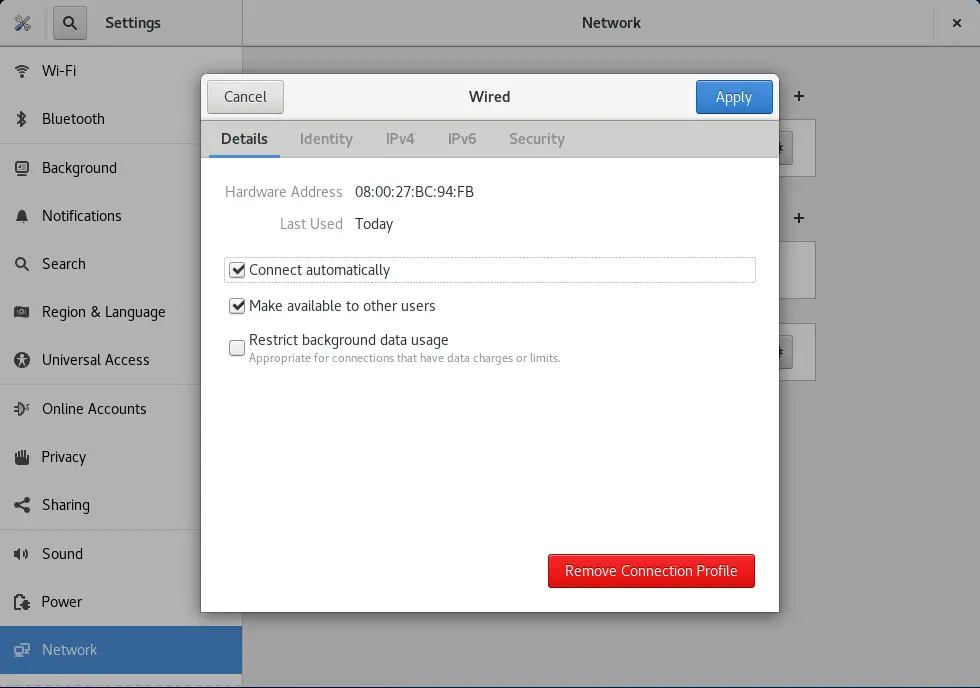
Start by setting your LAN connection to automatically connects to the internet. From the upper-right dropdown menu, go to Wired Settings. From the window opened, click the gear icon and tick Connect automatically. Click Apply.
Then update your repositories by running yum update and reboot your CentOS machine:
sudo yum update
Restart your CentOS after yum update.
Next, install the dependencies of VirtualBox Guest Additions. In the upper left corner, click Activities and search for Terminal. This will open a console/command prompt looking window. Install the dependencies by typing the below command:
sudo dnf install tar bzip2 kernel-devel-$(uname -r) kernel-headers perl gcc make elfutils-libelf-devel
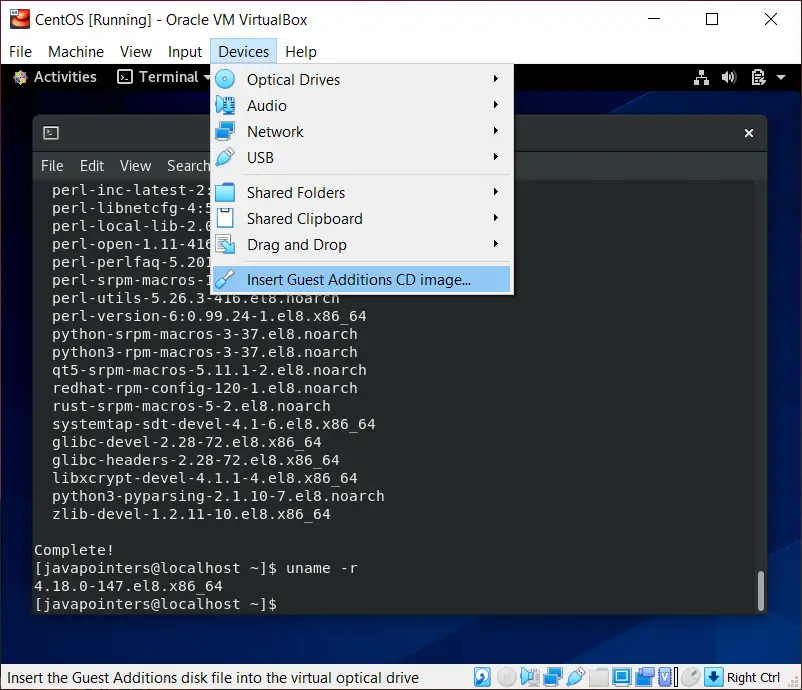
Next, go to Devices > Insert Guest Additions CD image.
Mount the disk using the below command:
sudo mount /dev/cdrom /mnt
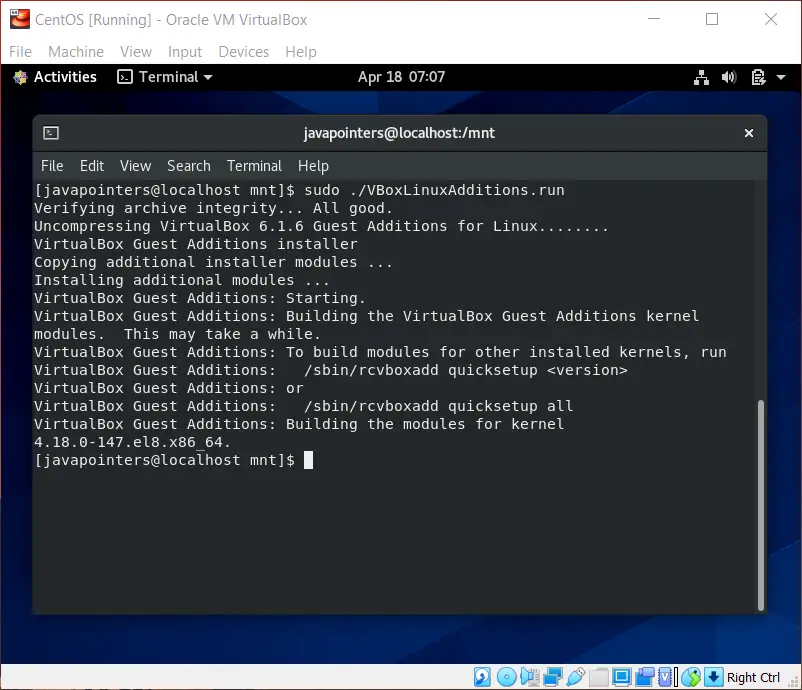
This will mount the guest additions cd to /mnt. Go to /mnt folder and install VirtualBox Guest Additions:
cd /mnt
sudo ./VBoxLinuxAdditions.run
It should properly install the VirtualBox Guest Additions. It should show something like this:
Unmount the cd by running the command:
cd /
sudo umount /mnt
Remove the disk in Drive > Optical Drive > Remove Disk. Click force unmount if it prompts. Restart your VM and test your copy/paste functionality. Your mouse should also seamlessly integrated on your VM.
That’s it for this guide on How to Install CentOS 8 on VirtualBox. We hope the screenshots help and let us know in the comments for any issues you’ve encountered. The next guide will show you how to install Java with JDK on Centos or any RHEL based Linux.