Cucumber Java Tutorial
In this tutorial, you will learn what is a Cucumber Framework, the advantages of Cucumber and how to get started with this Cucumber Java Tutorial.
What is Cucumber?
Cucumber is a testing framework which supports Behavior Driven Development (BDD). It lets us define application behavior in plain meaningful English text using a simple grammar defined by a language called Gherkin. Cucumber itself is written in Ruby, but it can be used to “test” code written in Ruby or other languages including but not limited to Java, C# and Python.
TDD vs BDD
- TDD is an iterative development process. Each iteration starts with a set of tests written for a new piece of functionality. These tests are supposed to fail during the start of iteration as there will be no application code corresponding to the tests. In the next phase of the iteration Application code is written with an intention to pass all the tests written earlier in the iteration. Once the application code is ready tests are run.
- Behavior Driven testing is an extension of TDD. Like in TDD in BDD also we write tests first and the add application code. The major difference that we get to see here are
- Tests are written in plain descriptive English type grammar
- Tests are explained as behavior of application and are more user focused
- Using examples to clarify requirements
What is Gherkin?
Gherkin is a simple, lightweight and structured language which uses regular spoken language to describe requirements and scenarios. By regular spoken language we mean English, French and around 30 more languages.
Common Problems solved by Gherkin language:
- Different teams in the project need a common language to express requirements. This language should be simple enough to be understood by Business team members and should be explicit enough to remove most of the ambiguities for developers and testers.
- This language should open up the thinking of team members to come up with more scenarios. As you express more details you try to visualize the system more and hence you end up making more user scenarios.
- This language should be good enough to be used as project documentation.
Example of Gherkin:
Feature: Search tutorials in JavaPointers

Scenario: A user search for a tutorial, the user related content results should be displayed in UI
Given User is on the main page of www.javapointers.com
When User search for Cucumber Java Tutorial
Then search page should be displayed with related contents
Getting Started with Cucumber in Java
Here’s an example of a simple cucumber java tutorial. Create a Maven Project. You can read our guide here if you don’t know how to create one.
In your pom.xml, add the cucumber dependencies:
<dependency>
    <groupId>io.cucumber</groupId>
    <artifactId>cucumber-java</artifactId>
    <version>4.4.0</version>
    <scope>test</scope>
</dependency>
<dependency>
    <groupId>io.cucumber</groupId>
    <artifactId>cucumber-junit</artifactId>
    <version>4.4.0</version>
    <scope>test</scope>
</dependency>
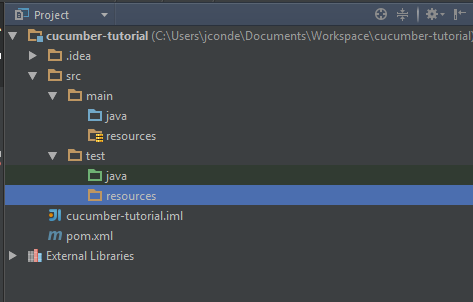
Then create the test resources folder in the src > test location.
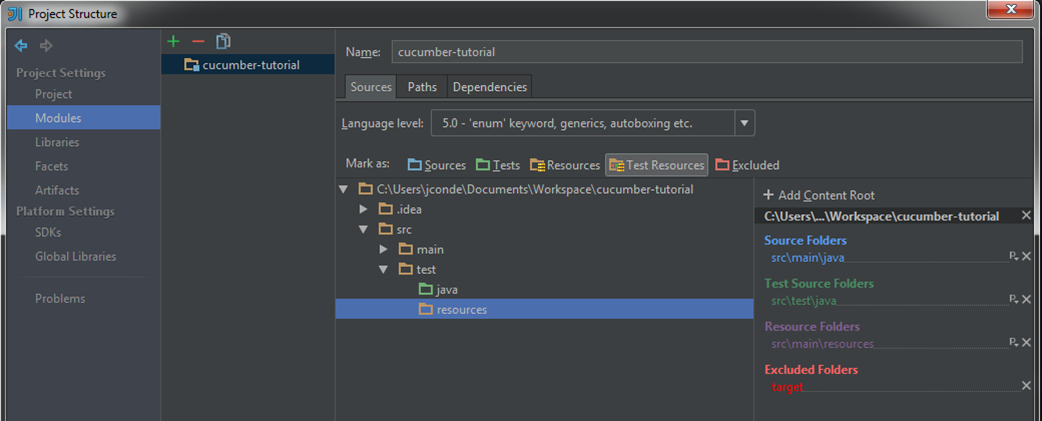
Next, set up your Project Structure. Go to File > Project Structure > Modules. Expand the tree and select the created resources folder and click Test Resources icon.
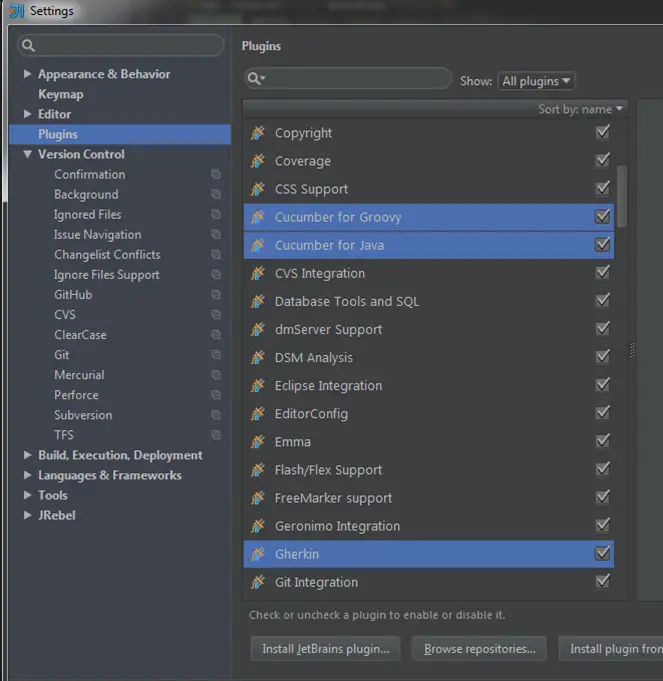
Install the necessary plugins in IntelliJ. Go to File > Settings and select the Plugins section.
- Cucumber for Java
- Cucumber for Groovy (Optional)
- Gherkin
Now we can create our feature file. Right-click the test resources folder, select New > File. You can name it anything but set the extension as .feature. For example, here is my string-palindrome.feature file:
Feature: Determine if String is Palindrome or not. A string is a palindrome if it reads   the same backwards as forwards.

Scenario: Valid Palindrome
Given I entered string "Refer"
When I test it for Palindrome
Then the result should be "true"

Scenario: Invalid Palindrome
Given I entered string "Coin"
When I test it for Palindrome
Then the result should be "false"
Create a new package or folder under src/main/test/java by right-clicking the java folder and select New > Package. Add any folder name and hit the OK button. This will be the package where all your step definitions will be saved.
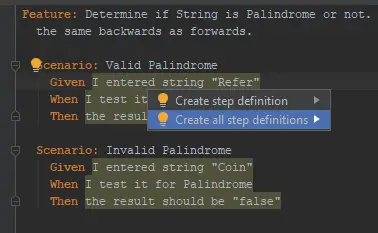
Next, we will add the Step Definitions. You can quickly add it by placing the cursor on the yellow highlighted string and press ALT + ENTER in keyboard (This might be different if you’re using other key mappings in IntelliJ).
This will show a popup on where you want to add the step definitions. Browse or enter the package that we have created earlier, and select if you want to use Java or Groovy. Repeat this until you created all the needed step definitions or until there is no warning (yellow) mark in your feature file.
Add your logic for each step definition that was created. For example, here’s the logic that we have added:
package cucumber;

import cucumber.api.java.en.Given;
import cucumber.api.java.en.Then;
import cucumber.api.java.en.When;
import org.junit.Assert;

public class PalindromeStepDef {

    private String testPalindrome;
    private boolean isPalindrome;

    @Given("I entered string {string}")
    public void iEnteredString(String toTest) {
        testPalindrome = toTest;
    }

    @When("I test it for Palindrome")
    public void iTestItForPalindrome() {
        isPalindrome = testPalindrome.equalsIgnoreCase(new StringBuilder(testPalindrome).reverse().toString());
    }

    @Then("the result should be {string}")
    public void theResultShouldBe(String result) {
        boolean expectedResult = Boolean.parseBoolean(result);
        if (expectedResult) {
            Assert.assertTrue(isPalindrome);
        } else {
            Assert.assertFalse(isPalindrome);
        }
    }
}
Finally, we can now run our feature file. Go to your feature file and right-click > Run Feature. This should start Cucumber and run your test.
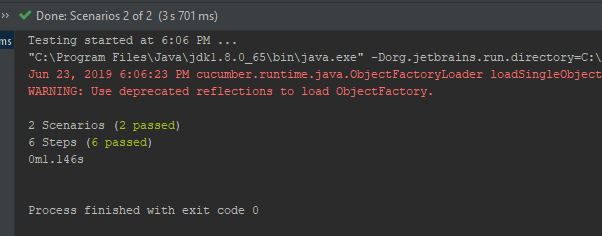
You can download the source we used in our example using this link.
That’s it for this simple Cucumber Java Tutorial. In our next post, we will learn how to use Scenario Outline in Cucumber. Let us know in the comments if this helps you to get started in the cucumber framework!