How to use @autowired annotation in Spring
Spring @autowired annotation means to tell Spring to handle the instantiation of the class.
1.Create Spring MVC project
In this post, we will be using maven as the build tool in creating our spring mvc project. First, create Spring MVC Project. If you do not know how to create one, click the link below:
How to create Spring MVC Project using Maven
2. Configure dispatcher-servlet.xml
Verify that your dispatcher-servlet.xml contains the base package to scan. The class that you will be autowiring should be inside the base package, and that mvc:annotation-driven is defined. So your dispatcher-servlet.xml should have an entry similar to this.
    <mvc:annotation-driven />
    <context:component-scan base-package="com.javapointers" />


        <property name="prefix" value="/WEB-INF/jsp/" />
        <property name="suffix" value=".jsp" />
3. Create a Class for Autowiring
Next, lets create a class inside our base package. In our case, we have created a new package named service inside our base package. Inside our service package, we have create a UserService class.
package com.javapointers.service;

import org.springframework.stereotype.Service;

@Service("userService")
public class UserService {

    public boolean login(String username, String password){
        if(username.equals("admin")){
            if(password.equals("password")){
                return true;
            }
        }
        return false;
    }
}
Take note of @Service annotation. This is necessary to tell Spring that this class is a Spring Bean.
4. Create a Controller
Now lets add our class in our Controller. We have create a simple Controller that has the variable userService that has @autowired annotation. For simplicity, we just made the request method to be GET and that the request parameters are included in the URL.
HomeController.java
package com.javapointers.controllers;

import com.javapointers.service.UserService;
import org.springframework.beans.factory.annotation.Autowired;
import org.springframework.stereotype.Controller;
import org.springframework.web.bind.annotation.PathVariable;
import org.springframework.web.bind.annotation.RequestMapping;
import org.springframework.web.bind.annotation.RequestMethod;

@Controller
public class HomeController {

    @Autowired
    private UserService userService;

    @RequestMapping(value = "/home", method = RequestMethod.GET)
    public String viewHome() {
        return "home";
    }

    @RequestMapping(value = "/home/{username}/{password}", method = RequestMethod.GET)
    public String login(@PathVariable("username") String username, @PathVariable("password") String password) {
        if (userService.login(username, password)) {
            return "success";
        }
        return "error";
    }
}
success.jsp
<%@ page contentType="text/html;charset=UTF-8" language="java" %>
<html>
<head>
    <title></title>
</head>
<body>
    <h2>Successfully entered!</h2>
</body>
</html>
error.jsp
<%@ page contentType="text/html;charset=UTF-8" language="java" %>
<html>
<head>
    <title></title>
</head>
<body>
    <h2>Error: You do not have permission</h2>
</body>
</html>
5. Testing your @autowired annotation
To test, run your project and in the url, type your context path and append “/home/admin/password”.
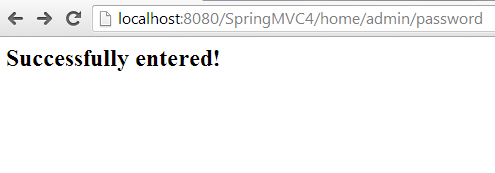
Changing the path variables to something different like “/home/admin/pass” should display the error page.

Download the source code here.