How to Install JDK on CentOS RHEL
This guide helps you on how to install JDK on CentOS or RHEL based Linux using a command line or terminal. You might also be interested in our guide on how to install VirtualBox and setup CentOS 8 in a virtual machine.
This StackOverflow link here consists of commands to download a specific version of JDK using wget command with automatic accepting the license agreement from Oracle. This guide shows you how to install JDK 8.
First, open a terminal in CentOS. Next, download JDK 8 by executing the below command:
wget -c --header "Cookie: oraclelicense=accept-securebackup-cookie" http://download.oracle.com/otn-pub/java/jdk/8u131-b11/d54c1d3a095b4ff2b6607d096fa80163/jdk-8u131-linux-x64.rpm
Next, on the same directory where you have downloaded the rpm file, install it using sudo yum localinstall <rpm file> eg:
sudo yum localinstall jdk-8u131-linux-x64.rpm
Follow the on-screen instructions. Verify that it has successfully installed Java by checking its version.
java -version

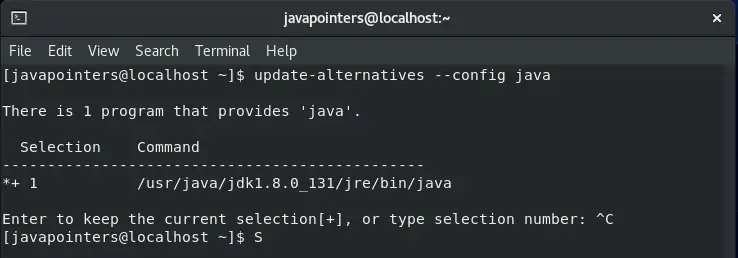
Next, we add the JAVA_HOME variable. First, we determine the location of Java in the system. Execute the below command to get the path. Note that it will prompt you to determine what version you want to use. We just need the path so just hit CTRL+C to exit the prompt and copy the Java path.
update-alternatives --config java

Go to your home folder and edit .bashrc. Use your favorite Linux text editor. In this case, we used nano. Then add JAVA_HOME variable with the location copied before using export command eg. export JAVA_HOME <path>.
cd ~
nano .bashrc

Save the file or if you are using nano, hit CTRL+O. Reload the file by executing below command:
source .bashrc
Then verify that the variable JAVA_HOME is now available by trying to echo it in the terminal.
echo $JAVA_HOME

That’s it. You have successfully installed JAVA and JDK in your CentOS machine. Let us know in the comments if this guide helps you or if there are issues you encountered while following this guide.