Docker Spring Boot Tutorial
Previously, we learned how to install Docker in our CentOS machine. Today, we will show you how we can create a docker image and run it to create a container in this Docker Spring Boot Tutorial.
This guide will teach you two ways to create a Dockerfile for a Spring Boot application. First is using the fat jar file of Spring Boot application and the other one is by extracting the jar file and separating the dependencies or libraries from the actual application. We will be using this simple spring boot application that we have written before. Since this will be a tutorial on implementing Docker, we skip the creation of a spring boot application. If you want, you can follow our guide from the link to create first your spring boot application.
Here’s the pom.xml that we have. Note that we have added a plugin in the build section to repackage the jar file into a spring boot application jar.
<?xml version="1.0" encoding="UTF-8"?>
<project xmlns="http://maven.apache.org/POM/4.0.0"
         xmlns:xsi="http://www.w3.org/2001/XMLSchema-instance"
         xsi:schemaLocation="http://maven.apache.org/POM/4.0.0 http://maven.apache.org/xsd/maven-4.0.0.xsd">
    <modelVersion>4.0.0</modelVersion>

    <groupId>com.javapointers</groupId>
    <artifactId>simple-spring-boot</artifactId>
    <version>1.0-SNAPSHOT</version>
    <packaging>jar</packaging>

    <parent>
        <groupId>org.springframework.boot</groupId>
        <artifactId>spring-boot-starter-parent</artifactId>
        <version>1.3.6.RELEASE</version>
        <relativePath/> <!-- lookup parent from repository -->
    </parent>

    <dependencies>
        <dependency>
            <groupId>org.springframework.boot</groupId>
            <artifactId>spring-boot-starter</artifactId>
        </dependency>
        <dependency>
            <groupId>org.springframework.boot</groupId>
            <artifactId>spring-boot-starter-web</artifactId>
        </dependency>
        <dependency>
            <groupId>org.springframework.boot</groupId>
            <artifactId>spring-boot-starter-thymeleaf</artifactId>
        </dependency>
        <dependency>
            <groupId>org.springframework.boot</groupId>
            <artifactId>spring-boot-devtools</artifactId>
        </dependency>
    </dependencies>

    <build>
        <plugins>
            <plugin>
                <groupId>org.springframework.boot</groupId>
                <artifactId>spring-boot-maven-plugin</artifactId>
            </plugin>
        </plugins>
    </build>
</project>
And here’s our application.properties file in the resources folder.
server.contextPath=/javapointers
server.port=8085
Dockerfile using Spring Boot Jar
This first implementation is basic. You just need to build the project, and create the Dockerfile. To start, you need to create a Dockerfile and save it in your project folder alongside your pom.xml. Next, add the below contents in the Dockerfile:
FROM openjdk:8-alpine
VOLUME /tmp
ARG JAR_FILE=target/*.jar
COPY ${JAR_FILE} app.jar
ENTRYPOINT ["java", "-jar", "/app.jar"]
Below are the basic descriptions of the keywords we have used in our Dockerfile:
- FROM – determines what base image we will be using in our docker image. This is helpful such as we don’t need to create an image from scratch. We can then just create an image on top of a working image. In this case, we have used openjdk image that’s already configured to have java installed. You can specify what version of openjdk you wanted to use by using the format openjdk:version eg. opendjk:8 for JDK 8. We also added -alpine which means that we will be using a minified version of Linux container making our image size smaller.
- VOLUME – means that docker will create /tmp volume inside the container. This is useful if we will be using the file system in our application, for example, writing a log file. It’s actually not needed in our simple spring boot application but it’s good to have it ready in place.
- ARG – creates a variable that you can use in your dockerfile.
- COPY – accepts 2 arguments which are the source and destination files.
- ENTRYPOINT – the command that will be run to start the application when running the container. Here in our example, we wanted to run java -jar /app.jar, thus, we added it in our ENTRYPOINT array.
Next, create the jar file by building the application. You can use your IDE or terminal to build the project. Then open a terminal and change the directory to your project folder. After that, build the docker image by running docker build -t <repo-name> <dockerfile path>. For example:
docker build -t simple-spring-boot .
Here, we specify -t which accepts an argument that will be used as the repository name. At the end of the command, we need to add the path where the Dockerfile is saved. In this case, since we are already inside the folder where we saved our Dockerfile, we only add a single dot which means the current directory.
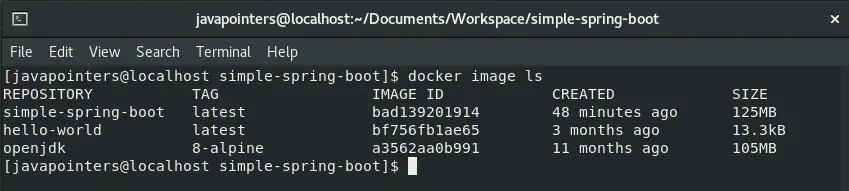
After successfully building the docker image, check if it’s added in the docker images. Execute docker image ls to show you the list of images in your machine.
docker image ls
Finally, we run the image by using the command docker run -p hostport:containerport <repository>. Our application.properties shows that we are using port 8085, thus, we also wanted to expose that port and route all requests from host port 8085 to container port 8085. Here’s an example of the docker run command:
docker run -p 8085:8085 simple-spring-boot
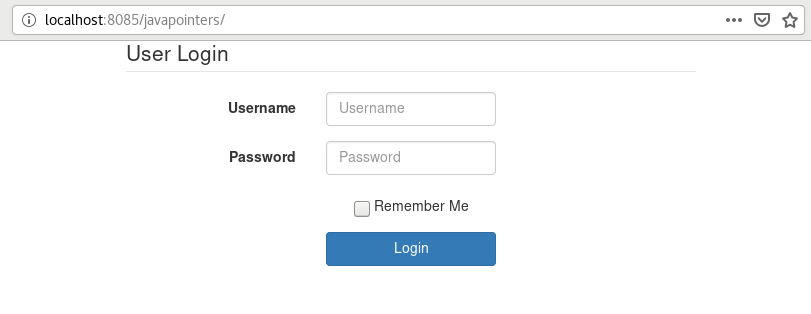
And this will get our application container up and running. You can access the application using localhost:8085/contextpath in your host browser. Now that you have learned how to create a basic docker file for a spring boot application, next section will guide you on how to tweak the docker file for security and separation of dependencies.
Better Implementation of Dockerfile for Spring Boot
In this section, we will show you how to tweak your Dockerfile to separate the dependencies from the main application program. This is a better way to write a Dockerfile in a Spring Boot Application as we are decoupling the dependencies. We also created a specific user that will be used inside the docker container for security.
FROM openjdk:8-alpine

RUN addgroup -S spring && adduser -S spring -G spring
USER spring:spring

ARG DEPENDENCY=target/dependency
COPY ${DEPENDENCY}/lib /app/lib
COPY ${DEPENDENCY}/META-INF /app/META-INF
COPY ${DEPENDENCY}/classes /app

VOLUME /tmp
EXPOSE 8085

ENTRYPOINT ["java", "-cp", "app:app/lib/*","com.javapointers.Application"]
Below are the summary descriptions of the new commands we introduced in our new Dockerfile:
- RUN – this executes a specific command in Linux. In our example, we add a group spring and user spring. You can execute any Linux commands inside the container using this keyword.
- USER – we specify which user to use in the container.
- EXPOSE – here we documented that our container should expose 8085. Take note that this will not take effect unless you use -P option in docker run command.
To use this new Dockerfile, first, we build the jar file as we have done before. Next, we will extract the source code, libraries and resources from the jar file and copy it in the target/dependecy folder. You can achieve that by executing the below command inside your project folder:
mkdir -p target/dependency && (cd target/dependency; jar -xf ../*.jar; cp -R ../classes .)
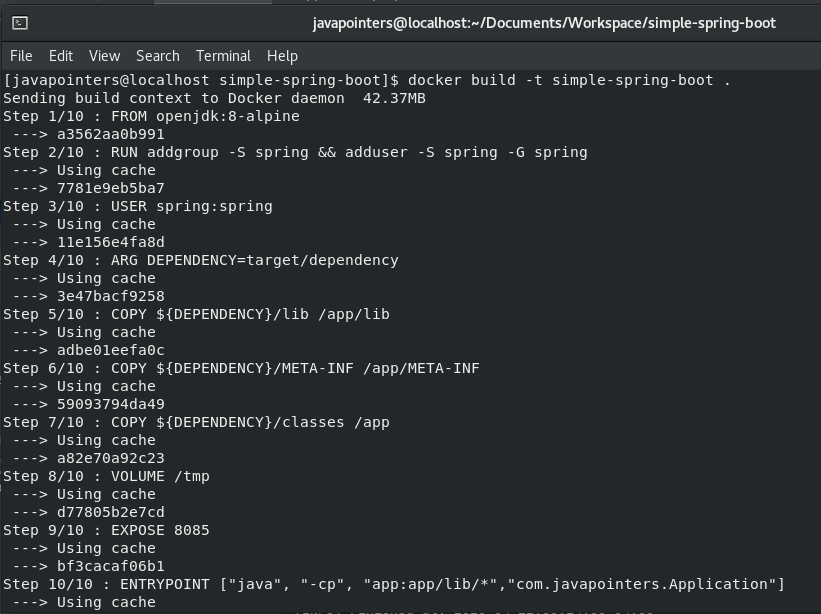
Then do the same command of building the image which is docker build -t <repo name> <Dockerfile location>.
docker build -t simple-spring-boot .
And finally, run the container using docker run command:
docker run -p 8085:8085 simple-spring-boot
Then try to test the page by visiting localhost:8085/contextpath in your host browser.
That concludes our docker spring boot tutorial. In summary, we have created 2 implementations of Dockerfile: first is a simple Dockerfile using the jar file created and the second one is a better implementation of Dockerfile by separating the dependencies plus adding another layer of security by adding a new user in the container.